
If summer had a flavor, it would taste like mango and coconut.
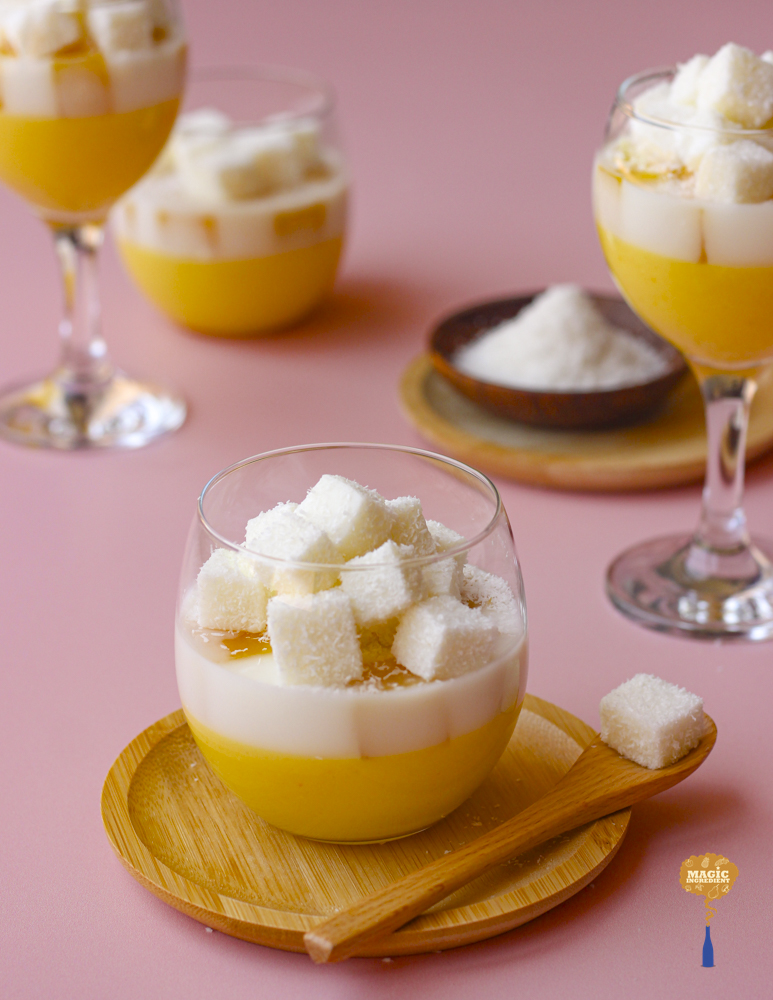
This tropical panna cotta is more than a dessert — it’s a sun-kissed vacation in a glass. With silky mango-coconut cream as its base, a playful middle of mango jelly cubes suspended in coconut milk panna cotta, and a finale of coconut cream jelly cubes rolled in desiccated coconut, this layered dessert is as fun to eat as it is to make.
Perfect for special gatherings or when you simply want to impress without baking, each spoonful is cool, creamy, and bursting with tropical goodness.
What makes this dessert truly special isn’t complexity — it’s intentional simplicity. I chose just two core ingredients: mango and coconut. Rather than masking them with extra flavors, I wanted to let them shine by exploring their different personalities across layers.
- The base is a silky mango-coconut panna cotta, where the richness of coconut cream softens the brightness of ripe mango, melting on the tongue like tropical velvet.
- The middle plays with structure — mango jelly cubes suspended inside a coconut milk panna cotta. This layer is playful, with gentle wobble and bite.
- The top flips the experience again: firm cubes of coconut cream jelly rolled in desiccated coconut for a chewy, nutty contrast — like the crisp topping of a warm dessert, but refreshingly cold.
With every spoonful, you taste how two familiar flavors can tell a new story when texture takes the lead.
This panna cotta is a celebration of texture and contrast: creamy meets jelly, smooth meets chewy, and sweet meets tropical. Each layer tells its own story but sings in harmony when served together.
So the next time you’re craving something chilled and cheerful, skip the store-bought pudding. This one’s worth the stir.
Preparation time: 2-3 hours
Cooking time: 40-45 minutes
Serves: 4-5
Ingredients
Mango-Coconut Cream Panna Cotta (Base):
Mango purée (about ¾ cup purée)
Coconut cream 200 ml
Full-cream coconut milk 100 ml
Sugar (adjust to taste) 2 Tbsp
Gelatin (or 1 tsp agar agar powder for vegetarian version) 1½ tsp
Water
For Mango Jelly Cubes:
Mango purée ¾ cup
Lemon juice 1 tsp
Sugar (optional, if mango isn’t sweet) 1 tbsp
Gelatin 1 tsp
Water (to bloom) 2 tbsp
Coconut Milk Panna Cotta (Middle Layer):
Coconut milk 200 ml
Cream or milk 100 ml
Sugar 1½ tbsp
Gelatin 1½ tsp
Water (to bloom) 2 tbsp
Coconut Cream Jelly Cubes (Topping):
Coconut cream 100 ml
Sugar 1 tbsp
Gelatin ½ tsp
Water (to bloom)
Desiccated coconut (for coating) ¼ cup
Method
Mango jellycubes
Bloom gelatin in water (let it sit 5–10 min).
Warm mango purée, lemon juice, and sugar in a saucepan on low heat.
Stir in the bloomed gelatin until dissolved.
Pour into a flat tray or container to a 1 cm height.
Refrigerate until set (about 1–2 hours), then cut into small cubes. Set aside.
Base layer – Mango coconut Pannacotta
Bloom gelatin in water.
In a saucepan, heat coconut cream, milk, and sugar until warm but not boiling.
Stir in mango purée and bloomed gelatin until fully dissolved.
Pour into serving glasses or molds to fill ⅓ of the height.
Chill for 2–3 hours until set.
Middle layer: Mango jelly cubes suspended in coconut milk, panna Cotta
Bloom gelatin in water.
Warm coconut milk, cream/milk, and sugar in a saucepan.
Stir in gelatin until fully dissolved.
Once the base layer is set, gently add a few mango jelly cubes on top.
Pour the coconut panna cotta mixture over the cubes to submerge them.
Chill again for another 2–3 hours.
Finish with Coconut Cream Jelly Cubes
Bloom gelatin in water.
Warm coconut cream and sugar, stir in gelatin.
Pour into a small flat container and chill until firm (1 hour).
Cut into cubes, then roll gently in desiccated coconut.
Top each panna cotta with a few cubes right before serving.
Discover more from Magic Ingredient
Subscribe to get the latest posts sent to your email.

So beautiful! I’m sure really refreshing.
LikeLike